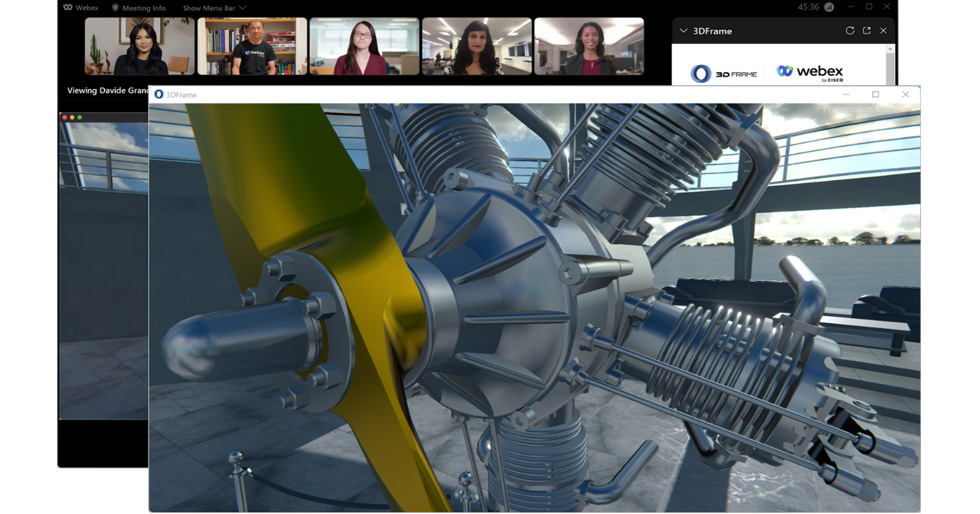
The emergence of new hybrid work models requires virtual meetings that foster participant inclusion and participation. This is now more possible than ever with the integration of Vection Technologies’ 3DFrame app within Webex meetings. This first-of-its-kind integration brings content shared in meetings to a new era of interactivity and immersive meeting experiences, leveraging Vection’s 3D and virtual reality (VR) technologies.
Often, content shared during online presentations is flat and static, resulting in impersonal presentations and a distracted audience. The 3DFrame integration for Webex allows presenters to seamlessly bring meeting content to life. Meeting participants can now be immersed in a 3D virtual environment that they can freely navigate at scale. All of this is incredibly easy to accomplish thanks to the no-code functionality of 3DFrame. Even the most complex 3D designs and animations can be created in just a few clicks, with no development skills required.
Meeting participants can experience this new level of interactivity without the need for a VR-ready desktop or VR headset. This is one of the features that makes the 3DFrame solution inclusive, extending accessibility to all regardless of the availability of a VR headset.
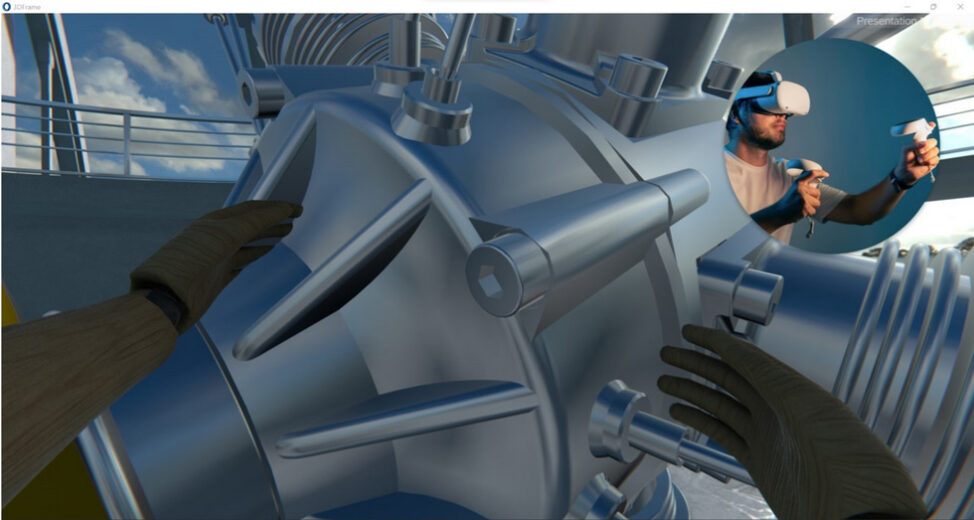
However, participants with a VR-ready desktop and VR headset can jump into a virtual world, unlocking a new level of immersive interaction between people and product content. In virtual reality, participants can naturally maneuver and configure 3D product models with their hands, fostering a more immersive and memorable experience.
This integration unlocks countless opportunities for businesses and organizations across industries, internally and externally: from product sales, technical support, and training, to learning and development.
From creating virtual product catalogs to demoing complex or larger-than-life products, 3DFrame enables powerful experiences by bringing your own metaverse to life right inside a Webex meeting.
Take a look at how you can get started.
Create your first 3DFrame presentation
Launch your Webex meeting and select 3DFrame from the Embedded Apps tray on the right-hand side.
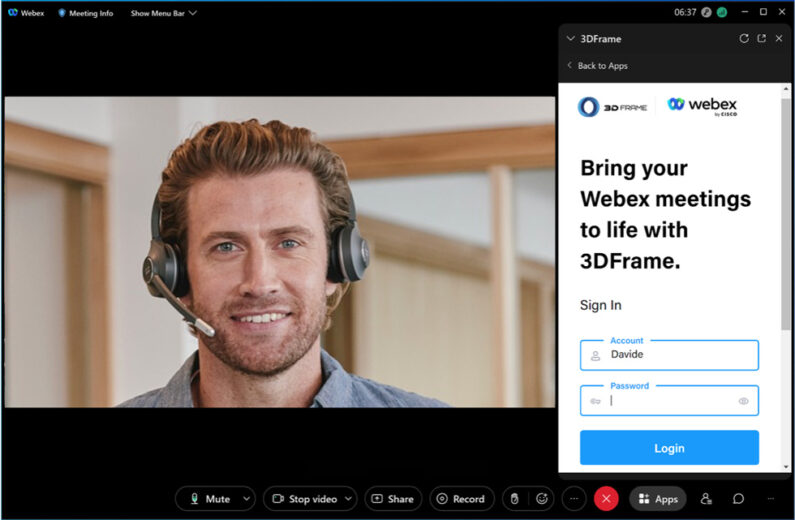
The first time you will have to download and install the 3DFrame app for Windows or macOS. Click on the menu to get access to the Download page.
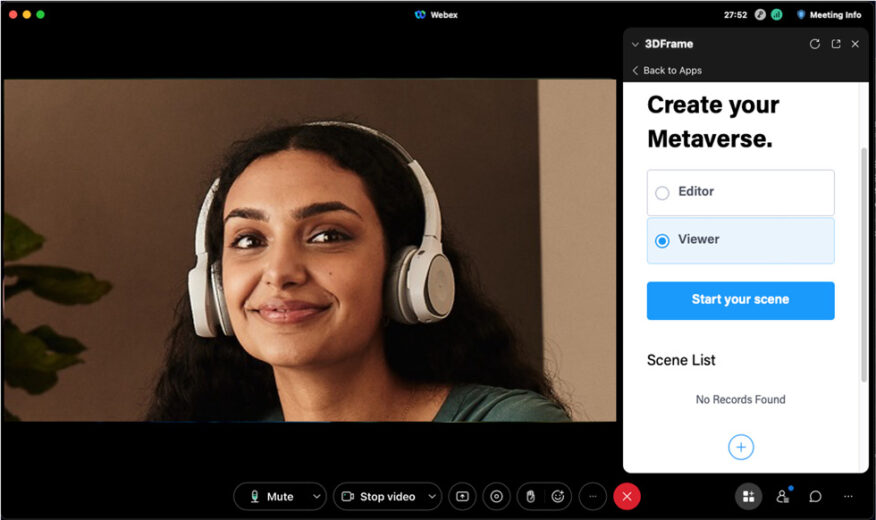
Click on the plus sign to create a new presentation and give it a name. Then select it and click on “Start your scene.” This launches 3DFrame showing your new empty scene. By default, all meeting participants are given the role of viewers in 3DFrame. You can change to editor for all at this stage but you can also grant and revoke editing access individually later on when the scene is shared with the meeting participants.
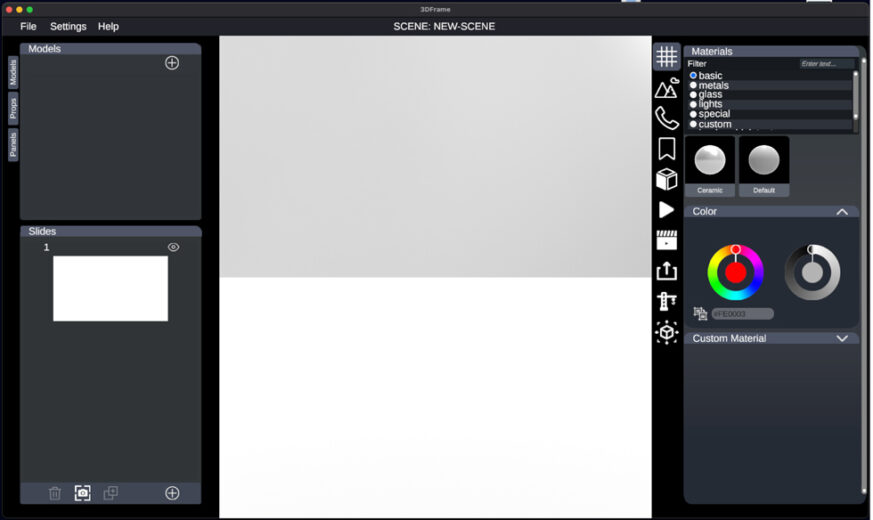
3DFrame allows for the quick and simple creation of your virtual environment. You will start by clicking on the plus sign in the Models tab at the top-left corner to add 3D Models.
Next, select the template of your choosing from the Environment Library or create, add, and select a custom environment of your own. Simply click on the screenshot button on the bottom left to bring your environment into your slide and add content as needed.
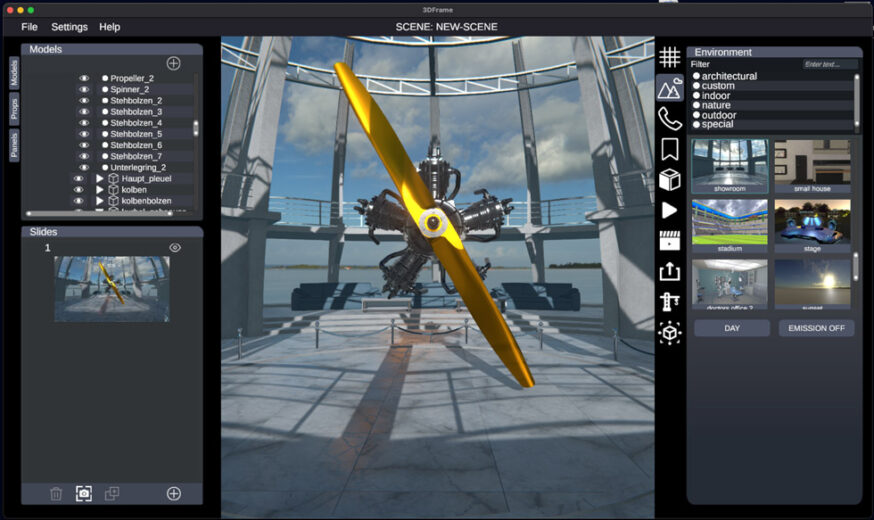
Now that your metaverse is created, click File > Save Scene and your first metaverse is ready for prime time!
To prepare more complex scenes with multiple models and content before your meeting, you can simply launch the 3DFrame app directly and work on your scenes. Start by importing 3D models and multimedia assets like videos, images and .pdf files to build out a metaverse that fits your unique needs.
The 3DFrame Toolbar, available to any user with editing privileges, provides a powerful set of tools that allow users to enrich and present content in the most effective way. Simply hide the toolbar and enter presentation mode by clicking F1.
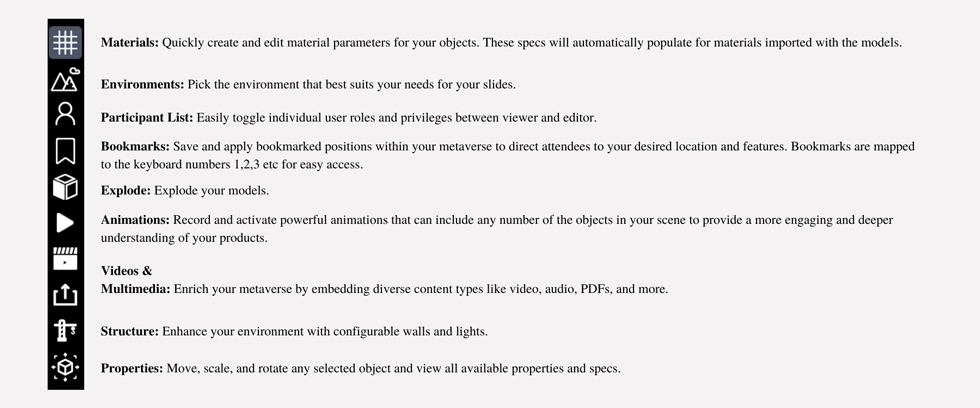
Enhance your metaverse with interactivity and inclusivity
As the 3DFrame host within your Webex meeting, click on “open for all” in the Embedded Apps panel to take participants directly into your virtual environment.
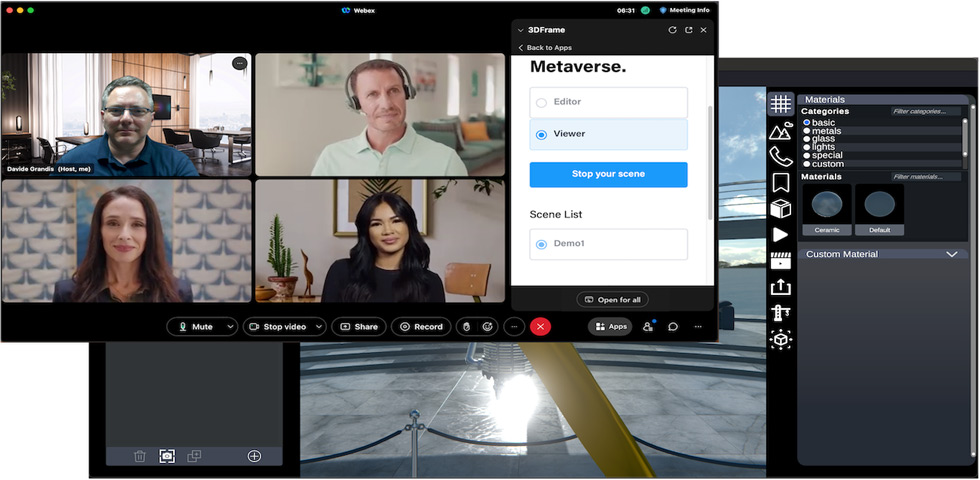
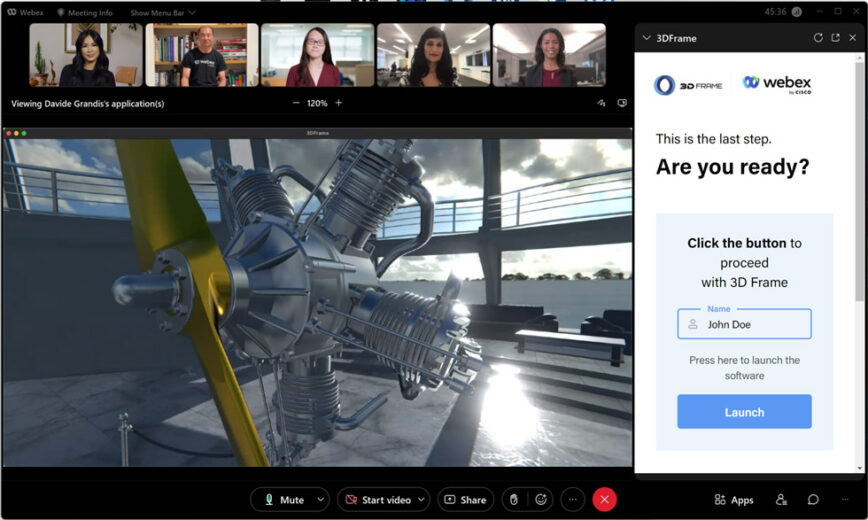
Attendees joining in 3D mode
Launching the app will bring you right into the 3D environment. The meeting media and controls are anchored to the Webex app or the paired video device while the 3D environment is provided by the 3DFrame app on your desktop.
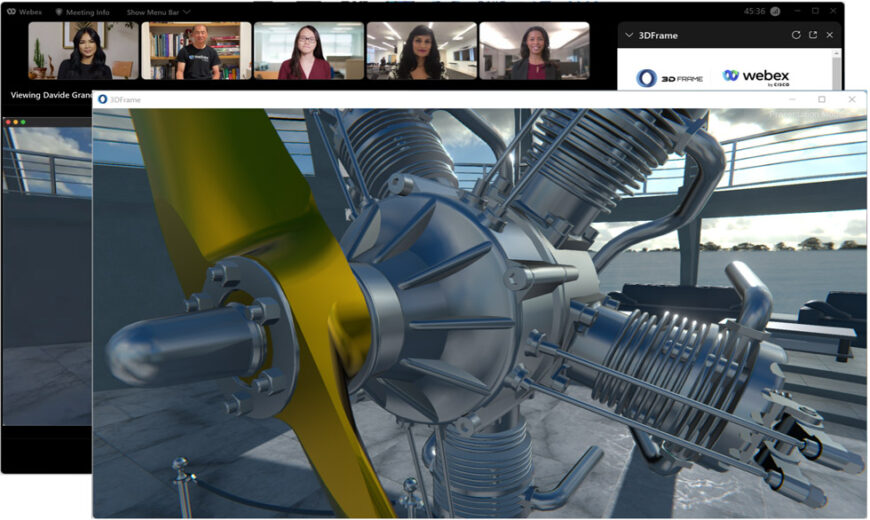
Once you’re in the 3DFrame metaverse you can freely move using your keyboard, providing a unique and engaging experience of the content within your environment.
- WASD keys
- Arrow up / Arrow down
- Right-click to rotate
Once the attendees join, they will be represented in the 3D environment with a spherical avatar color-coordinated with the 3DFrame participant list for easy identification of various participants.
Get immersed in virtual reality
Users that are equipped with a VR-ready PC and a standard VR headset can take their immersive experience even further with just one click.
With the headset turned on and connected to your device, simply launch 3DFrame, and select “VR Mode” from the settings menu. You will find yourself immersed within the metaverse with the ability to move around and interact directly with objects and models in the environment.
Get started Interactivity
Check out the Vection Technologies 3DFrame Embedded App in the Webex App Hub today. Visit Vection Technologies to learn more about the innovation behind the app.
Learn More:
