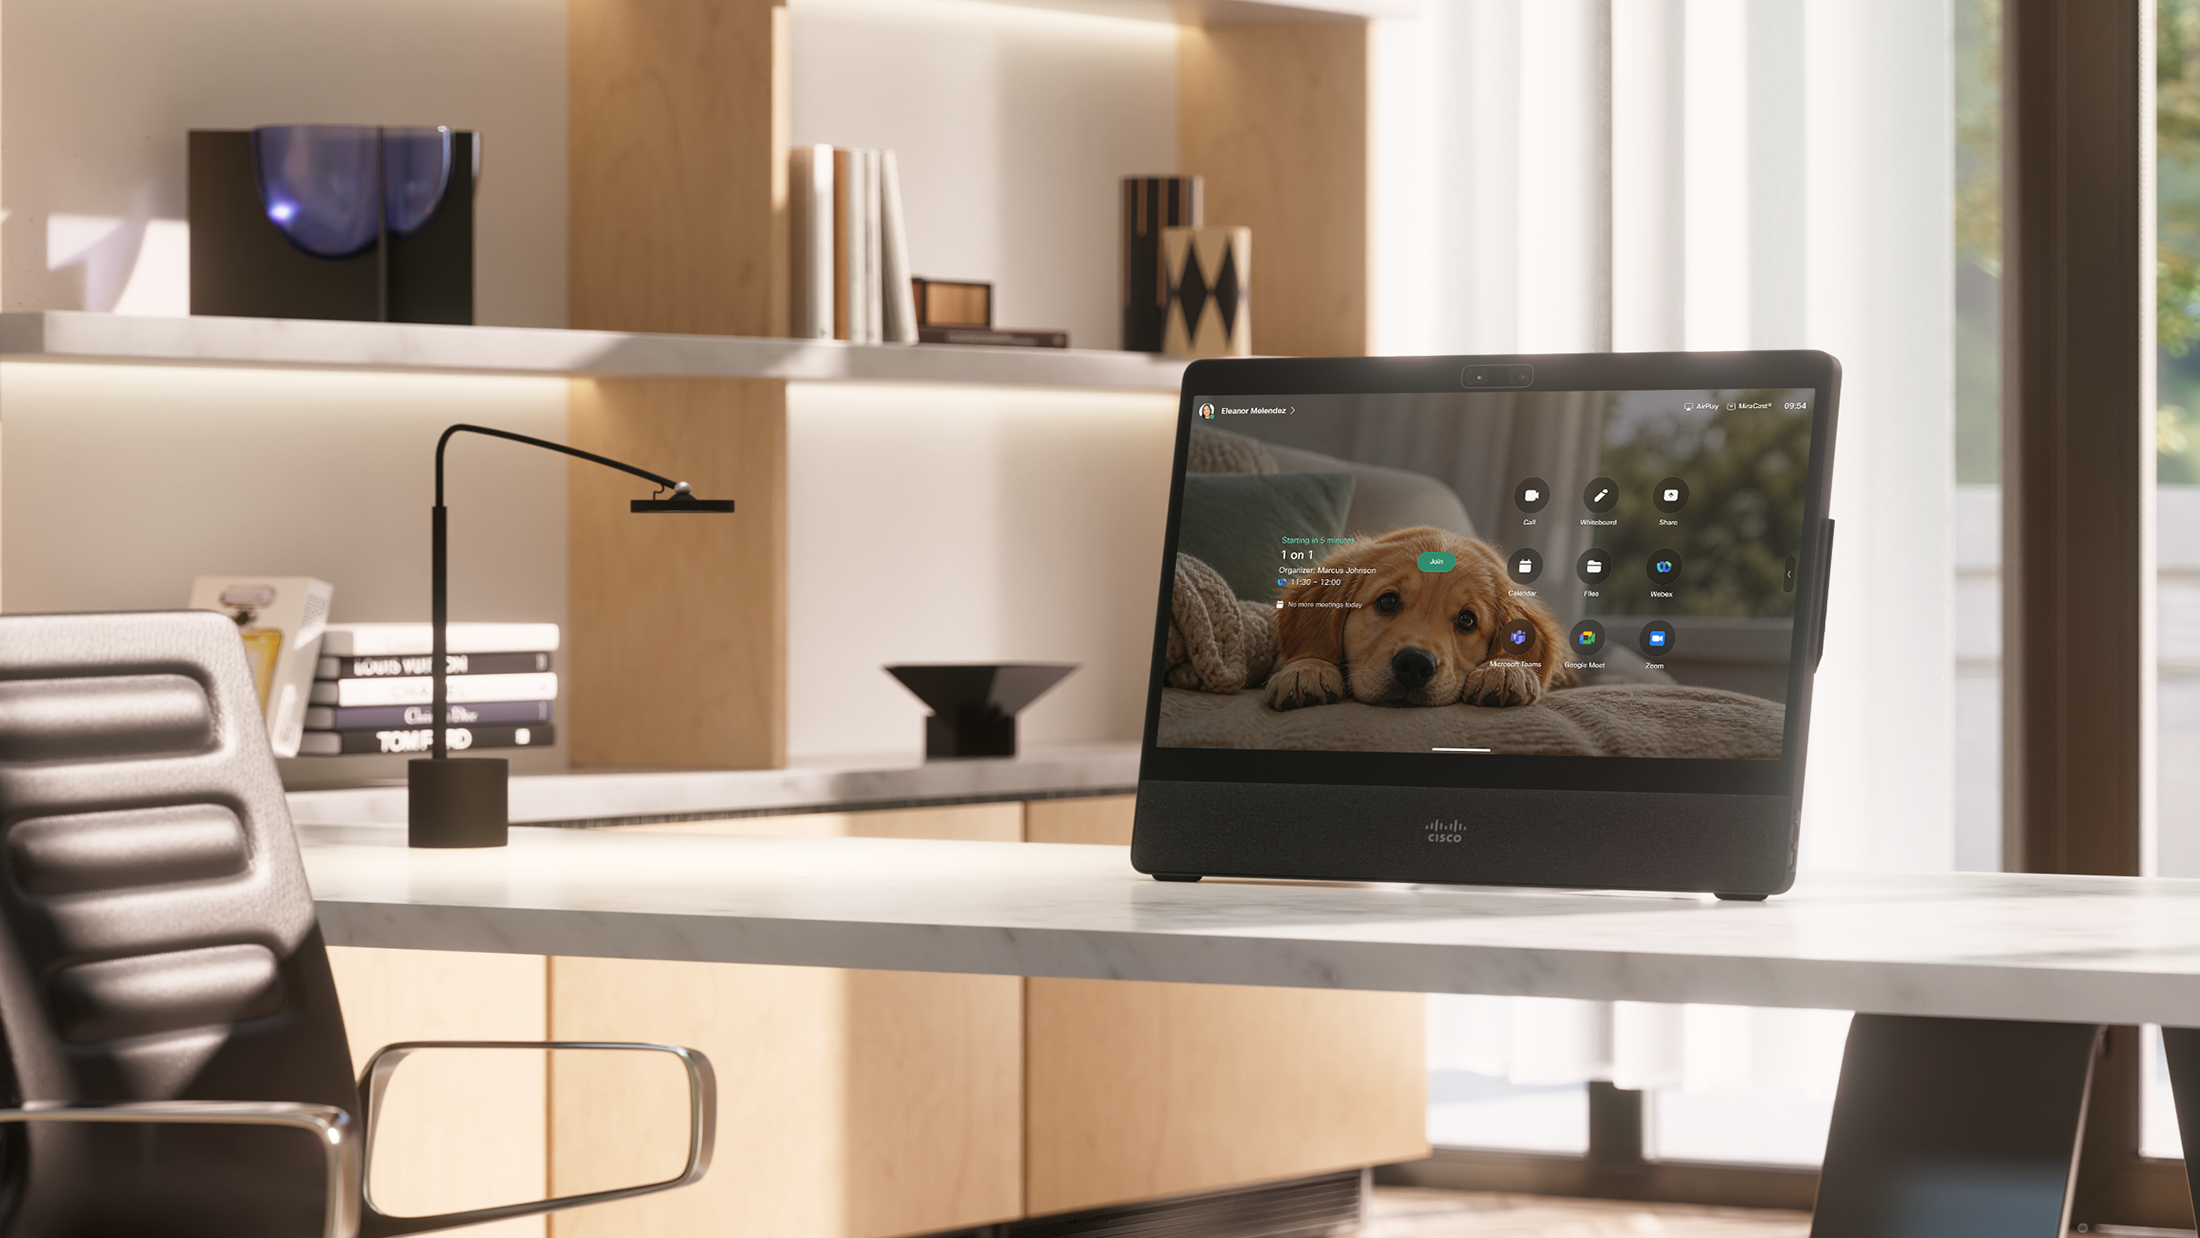
Your desk says a lot about you. Maybe it has family photos, awards, sticky notes, tiny desk trinkets, and one very specific pen no one else is allowed to borrow. Or maybe you prefer a clean surface with everything in its place and only a few details that make the day run more smoothly.
Your Cisco Desk device should reflect that personality too. The Cisco Desk Series is packed with the features IT teams love, like security, management, one-button join, and high-quality video and audio. But those same business-ready features can sometimes limit individual personalization.
So let me share this tip on local settings for your personal device so you can make it feel more like yours.
What you can customize with local settings.
Local settings are device-level controls in RoomOS, the Cisco operating system that powers Cisco collaboration devices. Depending on your device model, RoomOS version, and organization’s policies, these settings give you more room to make your Cisco Desk device feel like part of your workspace. You can keep the security and management capabilities built into Cisco Desk devices while personalizing the experience with wallpapers, wake settings, virtual backgrounds, web apps, shortcuts, UI extensions, macros, and more.
On supported cloud-registered devices, local settings may allow you to:
- Change the wallpaper, wake settings, and virtual background
- Add UI extensions, such as a panel for lights or a digital action button
- Add web apps or web widgets to the device experience
- Create macros for automation
- View environmental stats, such as noise, temperature, and humidity
Available options vary by device model, RoomOS version, and organization policy.
Things to know before you start.
This isn’t a one-click setting. The process includes several steps, and a factory reset, plus a little “okay, where did that menu go?” energy. Once you know the sequence, it makes sense—but you do need to complete the steps in order.
If technology makes you want to slowly close the laptop and go for a walk, this may not be the project for you. But if you are comfortable poking around settings, copying an activation code, and following a sequence, you can absolutely do this.
You’ll need:
- A Cisco Desk device
- Access to settings.webex.com
- The device’s IP address
- A laptop connected to the same local network as the Desk device
- Your Wi-Fi password, if the device uses a wireless connection
- About 15 minutes
A VPN may prevent your laptop from connecting to the device’s local IP address. If your organization permits it, temporarily disconnect from the VPN while completing the local setup. Your laptop and Desk device must be able to communicate over the same network.
Step 1: Generate an activation code.
Start at settings.webex.com and sign in.
Go to Settings > Devices, add your device, and generate an activation code.
Copy the code and save it temporarily—you’ll need it in step 6 to register the device with Webex.
Note: If the device is already listed under your devices, remove it first so you can generate a fresh activation code.
Step 2: Copy down the device IP address.
On the Cisco Desk device, go to:
Settings > About this device > IP Address
Copy down the IP address. You’ll enter this address in a web browser after the factory reset.
Step 3: Factory reset the device.
From the device settings, choose Factory reset and wait for the device to reboot.
When the setup flow begins, connect the device to Wi-Fi or a wired network. Once it’s connected, pause the setup process.
Do not enter the activation code yet.
That pause is important. You want the device on the network, but not registered, so you can create local access while the device is still open for setup.
Step 4: Open the local web interface.
On your laptop, open a web browser and enter the device IP address directly in the address bar.
For example:
https://192.168.1.25
Your browser may display a security warning because the device’s local web interface uses a self-signed certificate. Confirm that the address matches your device’s IP address and that you’re connected to the trusted local network before continuing to the sign-in page.
Step 5: Create local admin access.
Sign in with:
- Username: admin
- Password: leave blank
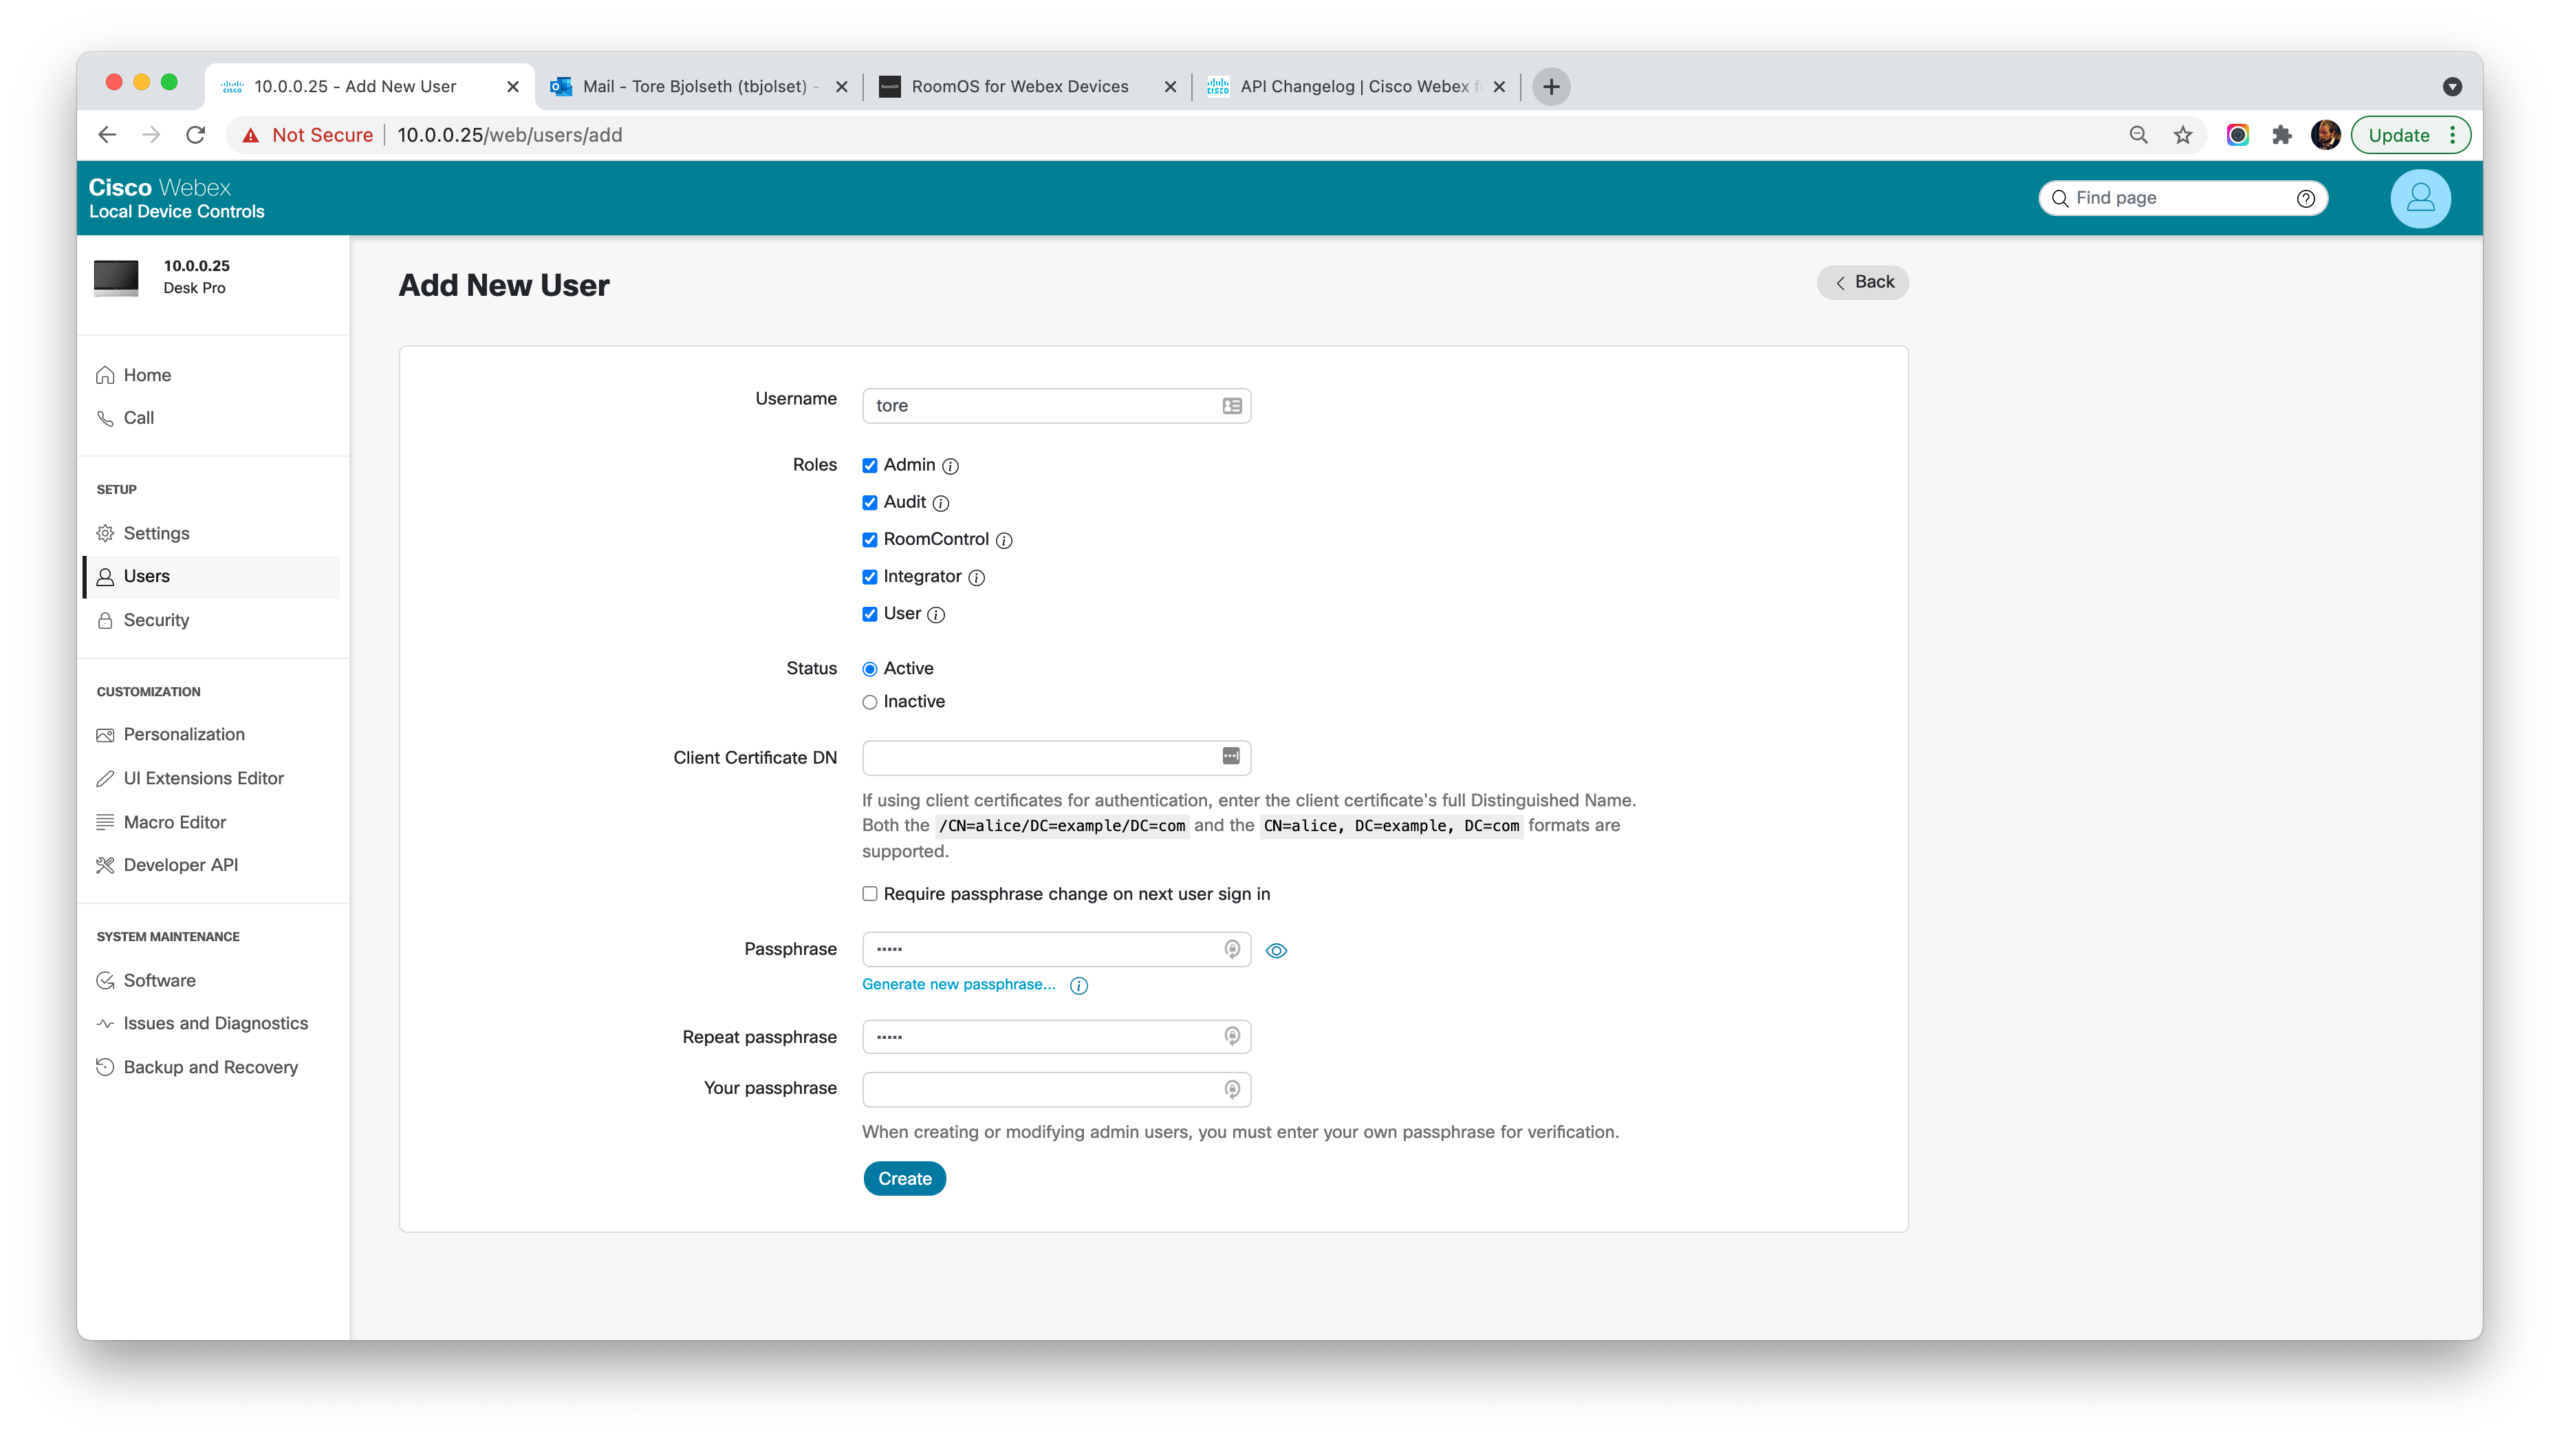
After signing in, follow the prompt to create a local administrator password. If your device directs you to Users > Create user, create a username, select admin as your role, enter a strong passphrase, and confirm that the user was created successfully.
Store the local username and passphrase in an approved password manager. You’ll use these credentials to access device settings, customizations, and integrations.
Step 6: Register to Webex from the local web interface.
Register the device from the web interface—not from the device screen.
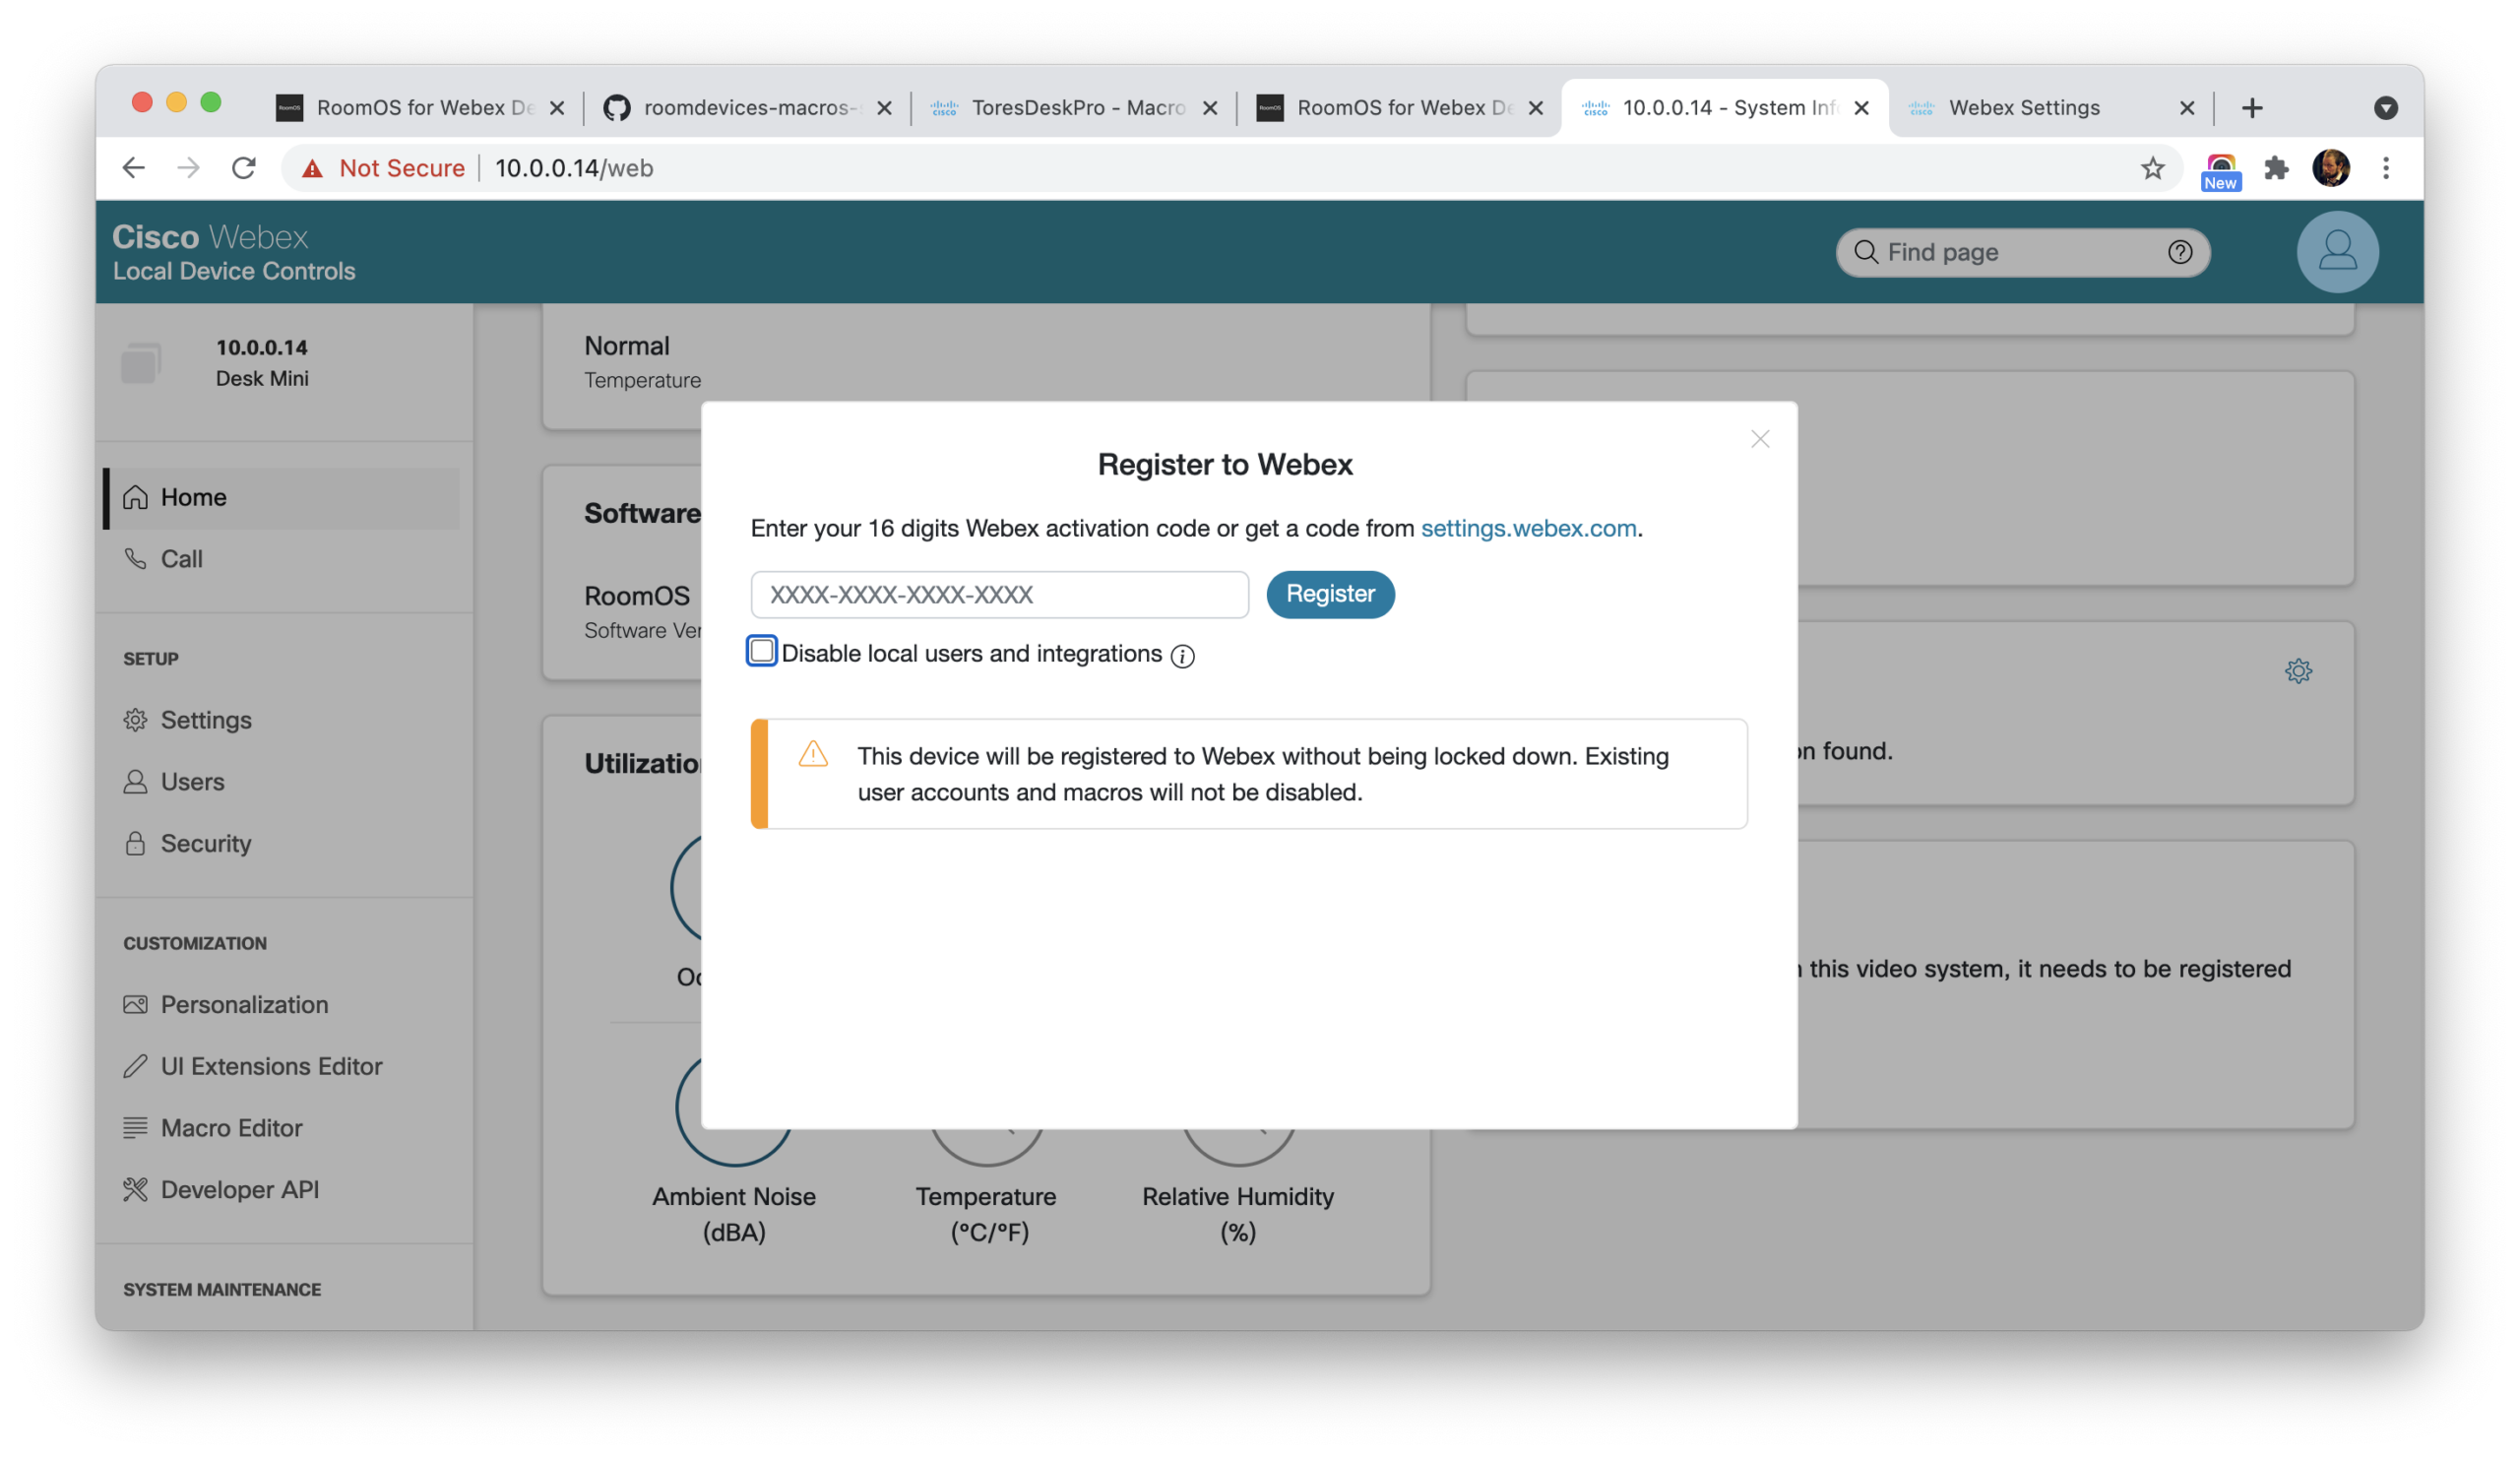
From Home, select Register to Webex and enter the activation code you generated in step 1.
Important: Before completing registration, clear the following checkbox:
Disable local users and integrations
This is the most important setting in the process. Clearing the checkbox keeps local users and integrations enabled after the device is registered with Webex, preserving the local administrator access you created in step 5.
Step 7: Finish setup on the Desk Device.
Return to the Cisco Desk device and continue through the remaining setup screens.
Do not enter the activation code again. The device was already registered with Webex through the local web interface in step 6.
Complete the remaining options, such as your time zone, and allow the device to load its Webex configuration. When setup is complete, return to the local web interface in your browser. Sign out, then sign in again using the local administrator credentials you created in step 5.
If you can sign in successfully, your local access is active, and the setup is complete.
Now the fun part: make your Desk device your own.
Once local settings are enabled, your Desk device stops feeling so factory-default and starts feeling more like part of your actual workspace.
This is where you can add the personal touches: update the wallpaper, adjust wake settings, set a virtual background, add web apps or web widgets, and build UI extensions like a lights panel or a digital action button. You can also use macros for automation and view environmental stats like noise, temperature, and humidity.
The goal is not to turn your business device into chaos. It is to keep the secure Cisco Desk experience and add the small details that make it more useful, more personal, and a little more yours.
Use your new power carefully.
Local settings give you more flexibility, but they also give you more control than the standard user experience. That means it is worth being thoughtful with what you change.
If you adjust network, calling, security, or integration settings, record what you changed and note the previous values. Future you will thank you, and so will anyone helping you troubleshoot or reverse a change later.
And please protect your local admin password. It is the key to the settings kingdom, and we do not leave kingdom keys lying around.
Helpful resources
| Resource | Link |
| Local admin access guide | https://roomos.cisco.com/doc/TechDocs/LocalAdminUser |
| RoomOS integrations explained | https://roomos.cisco.com/doc/TechDocs/Integrations |
| User Interface Extensions | https://roomos.cisco.com/doc/TechDocs/UiExtensions |
| RoomOS home | https://roomos.cisco.com |
About The Author